Menards Snow Vendors, Welcome to Cappsure!

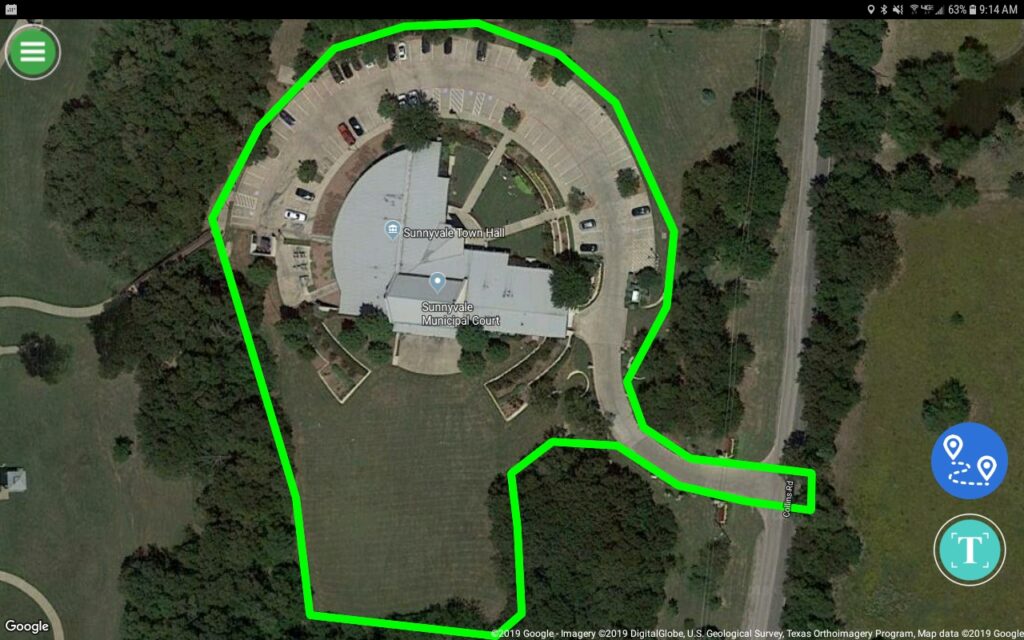
View these quick instructional videos to get started ___________________________ How the Cappsure App Works While Servicing Your Menards Location : httpss://youtu.be/JirLnQBBkgY How to Load Cappsure from the Invite Email: httpss://www.youtube.com/watch?v=qEYcbsuXG_o&t=32s How to Invite Team Members From Your Mobile Device: httpss://www.youtube.com/watch?v=f4FO1IGFF_I Log In To Cappsure And View Your GPS Reports . httpss://www.youtube.com/watch?v=FXfhUDFcPKw More Questions? Email our […]
Cappsure Integrates With Zapier!

Cappsure is proud to announce that we are partnering with Zapier to enable our users to connect their Cappsure accounts with over 1,500 different applications currently on Zapier. Zapier is a platform which connects apps with each other without having to write any computer code. Learn more about Zapier here: //zapier.com/app/explore Here is a simple Use […]
Invoicing and Billing

The Cappsure team was hard at work this summer fine-tuning and developing a number of features that revolve around billable items in the system. One of the primary updates we released includes an entire new section on the website called “Invoices” as well as an exciting new integration functionality through Zapier, enabling Cappsure to integrate […]
June Updates for Cappsure
With June upon us, we have a couple of new releases coming out that include a few fixes as well as a some new functionality that we hope you can take advantage of. This week’s release included the following: Update to Productivity Reports – we have added some additional data sources you can track in […]
April Updates for Cappsure
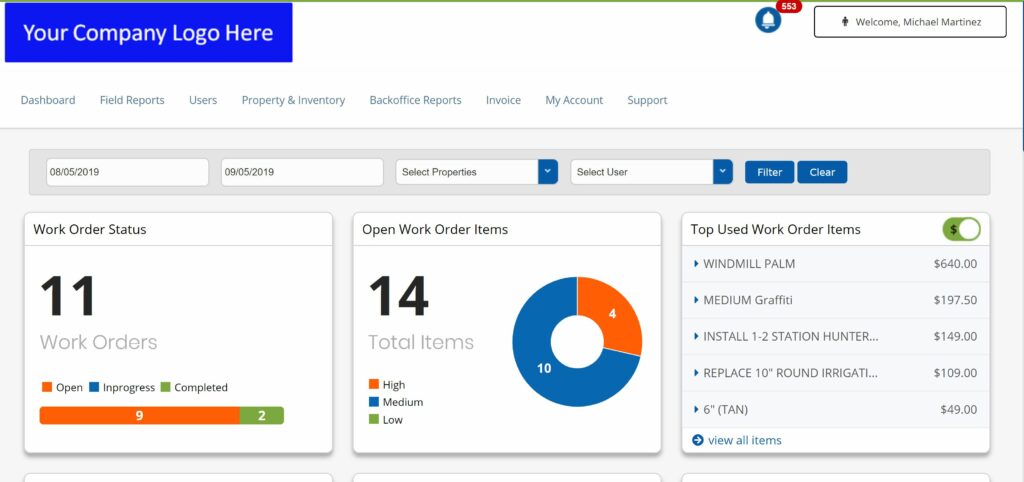
As spring starts picking up, and with summer around the corner, Cappsure is excited to begin sharing a few changes that we hope will improve our users’ experiences with the App. The new release includes the following changes: A New Drill Down Dashboard – built for the website but also accessible through a mobile web […]